

How To Install Grip It Fixings
What are Grip It Plasterboard fixings?
Grip It Fixings are a unique new blueprint of universal plasterboard fixings. These fixings take been designed for use with all types of plasterboard, giving an extremely strong grip and loftier load bearing.
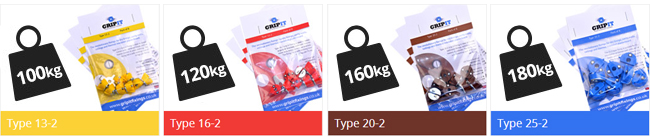
Consummate in 4 different sizes to adapt various applications with the heaviest fixing being able to accept a load of up to 180kg.
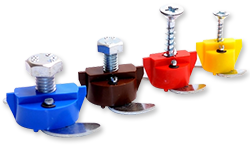
Grip Information technology Fixings Production Range
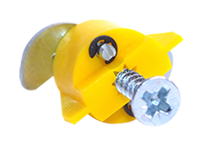
The Type 13-2 is the ideal fixing for small DIY applications such as pall rails, picture frames, mirrors and small shelves. These xanthous fixings require a 13mm drill bit and have a max. shear load of 100kg.
Complete in a pack of 8 fixings with 4.0 x 25mm screws, a depth gauge and instructions included.
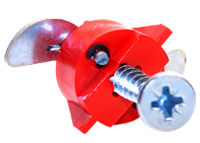
The Blazon xvi-2 is the ideal fixing for slightly heavier DIY applications such as large curtain rails, towel rails and bathroom fixtures. The red Grip It fixings require a 16mm hole inside the plasterboard and tin take a maximum load of 120kg.
Complete in a pack of 4 fixings with 5.0 x 30mm screws, a depth gauge and instructions included.
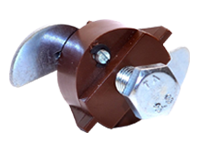
The Type 20-two fittings are nearly suitable for bath furniture, radiators, h2o heaters, cabinets and other bathroom fittings. The chocolate-brown fixings tin can have a load of up to 160kg and demand a 20mm drill bit.
Complete in a pack of 4 fixings with M6 x 30mm screws, a depth approximate and instructions included.
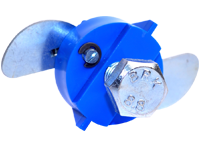
The Type 25-two is the heaviest fitting, perfect for installing kitchen cupboards, water heaters and wall mounted televisions. These blueish fixings need a 25mm pigsty drilled in the plasterboard and will accept a huge 180kg maximum load.
Consummate in a pack of 4 fixings with M8 10 30mm screws, a depth guess and instructions included.
How practice Grip It Fixings piece of work?
Grip Information technology Fixings are a elementary, yet effective plasterboard fixing designed to reduce the space taken up in the cavity and provide high load ratings. Once the fixing has been installed you simply rotate the metal wings to concur it behind the plasterboard.
Total installation instructions:
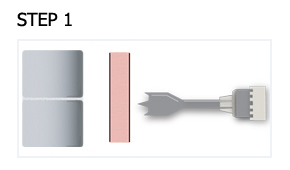
Mark out the centre of the hole yous are going to drill in the plasterboard and drill it to the specified size. For best results apply a flat drill bit.
Position the Grip Information technology fixing in the pigsty, ensuring the anti-rotation blades are horiztonal.
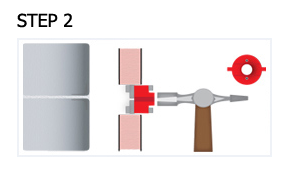
Gently tap the fixing into the pigsty with a lite hammer until information technology is near the plasterboard surface. Next hand turn a screw into the fixing a couple of times.
Keep to gently tap the screw head until the Grip It fixing is recessed into the plasterboard.
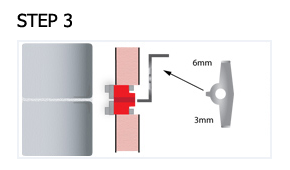
Now use the gauge supplied to check that the fixing is either 3mm or 6mm below the surface (6mm for rendered plasterboard, 3mm for non).
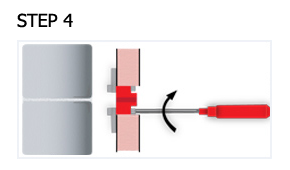
Now use a pocket-size flat head screwdriver and turn the two pocket-size screws approximately 1/3 turn clockwise until resistance is felt. This secures the locking wings into place.
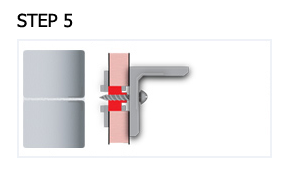
Next secure the particular you lot are hanging to the Grip It fixing either using the screws supplied or using your own screws.
Grip It Maximum Load Ratings

Source: https://www.raygrahams.com/blog/67-grip-it-plasterboard-fixings.aspx
Posted by: nancewhince00.blogspot.com
0 Response to "How To Install Grip It Fixings"
Post a Comment